


NCI Curriculum Developer & Instructor
Picture yourself troubleshooting the following CO call and think about the pattern that’s followed. Remember, you’re going to be the hero on this call!
The Call
Long-time customers of yours, the Smith family, have recently moved into a new home. The previous homeowners replaced their old furnace with a direct-vent 90% efficient condensing furnace before selling the home to the Smiths.
Mrs. Smith recently called you because the low-level CO monitor they previously purchased from you is occasionally alarming in their new home. They want you to investigate why the monitor is reading 10 – 20 ppm while a store-bought CO alarm, left by the previous owners, is reading 0 ppm. They’re also interested in better air filtration as they now are experiencing allergy-like symptoms since moving in.
When the dispatcher finds out the call involves CO, you’re dispatched immediately. The dispatcher asks Mrs. Smith how she feels, she answers, “fine.” The dispatcher lets Mrs. Smith know the testing procedures involved and that there may be more than a bad carbon monoxide alarm causing this issue.
Arrival at the Smith Residence
The Smith residence is a single-story ranch on a crawlspace with an attached two-car garage. Upon arrival, you inspect the building’s exterior to identify exhaust terminations, venting conditions, and any other items of potential that cause CO issues. Nothing looks out of the ordinary or suspicious.
Before going inside, you start your combustion analyzer outside and allow it to zero. With your analyzer running and personal CO monitor on your side, you walk through the residence to determine if any carbon monoxide is in the ambient air.
You measure 10 ppm on the display of your combustion analyzer and personal CO monitor. This matches the display of Mrs. Smith’s low-level monitor that’s mounted in the hallway at eye level. You know it’s okay to continue testing, but you’re very aware of your surroundings from this point. If anyone susceptible to low CO levels were inside the building, you know you need to advise them of the issue. So now it’s time to find the source of CO.
Carbon Monoxide is no laughing matter. Are your technicians prepared to be heroes?
Equipment and System Inspections for CO Issues
The new 90% direct-vent furnace and existing natural draft water heater are both located in a hall closet with louvered doors. These are the only gas appliances in the home. The duct system has a single central-return grille with all supply ducts located in the attic. You notice the single return-duct was sealed and renovated during the equipment replacement, but the supply ducts were left unsealed and in rough shape.
As you inspect the natural-draft water heater, you notice the plastic grommets around the water lines are melted. From your training you know this is a visual clue indicating flue gas spillage. After a quick check to assure no fuel leaks are present, it’s time to begin testing.
Water Heater Testing
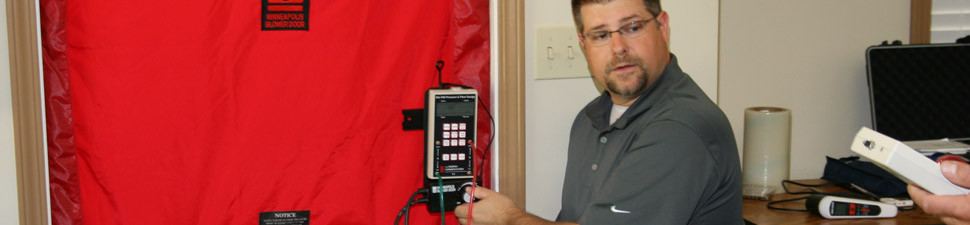
Your testing begins with the smallest vented piece of equipment, in this setting that is the water heater. You prepare the water heater for testing by drilling test holes, inserting your analyzer probe inside the heat exchanger of the water heater, before the drafthood, and inserting your draft gauge 18 – 24 inches above the drafthood.
So you turn on the water heater and begin to record the CO readings. You know that at least three CO readings taken during the run cycle are needed to determine the action of the flue gases and equipment safety.
Your three readings measured in the flue gas are: 15 ppm, 15 ppm, and 15 ppm. Draft pressure is -.02” and holding steady.
Again, your training tells you that the CO readings should be less than 100 ppm and stable. Since the readings are stable during the entire run cycle, you know the appliance is venting properly at this time. The flue gases are leaving the equipment as intended. The draft pressure is also where it needs to be.
Something still isn’t making sense. You have visual signs of flue gas spillage from the water heater due to the melted grommets, but your CO readings are showing the water heater is operating safely at this point in time. Could there be something else going on that’s creating the spillage?
David Richardson says, “The answers are out there and together we will find them. If you need any additional information on this material or have any questions feel free to e-mail me at DavidR@NCIHVAC.com. You can also find me on twitter@ncidavid.”
Leave a Reply
You must be logged in to post a comment.